

Custom domains let you serve your app from your own domain name (for example, api.acme.com) instead of a *.unkey.app subdomain. Unkey handles TLS certificate provisioning and renewal automatically.
Add a custom domain#
Open domain settings
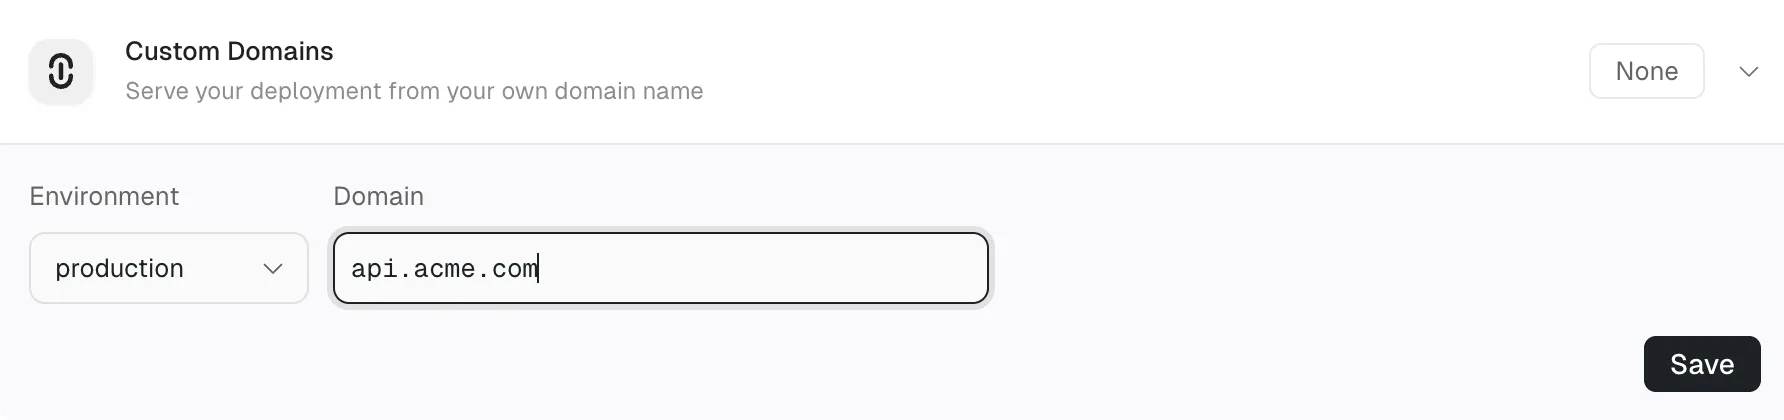
Navigate to your project in the dashboard and click Settings. Scroll to the Custom domains section.
Enter your domain
Select the environment and enter the fully qualified domain name you want to use (for example, api.acme.com).
Configure DNS records
After you add a domain, Unkey checks whether your DNS provider supports automatic setup. If it does, you can configure your DNS records with one click. Otherwise, you add the records manually.
If your DNS provider supports the Domain Connect protocol, an Automatic setup available card appears with your provider's name. Click Connect to open your DNS provider's consent page, approve the changes, and the required DNS records are created for you automatically.
After you approve, Unkey begins verification immediately. No manual DNS configuration is needed.
The following providers are supported for automatic setup:
- Cloudflare
- Vercel DNS
Automatic setup works for subdomains out of the box. For apex (root) domains, some providers like Cloudflare (via CNAME flattening) and Vercel (via ALIAS records through Domain Connect) also support automatic setup. If your provider does not support these features, configure DNS manually instead.
If automatic setup is not available, Unkey generates DNS records for you to add at your DNS provider:
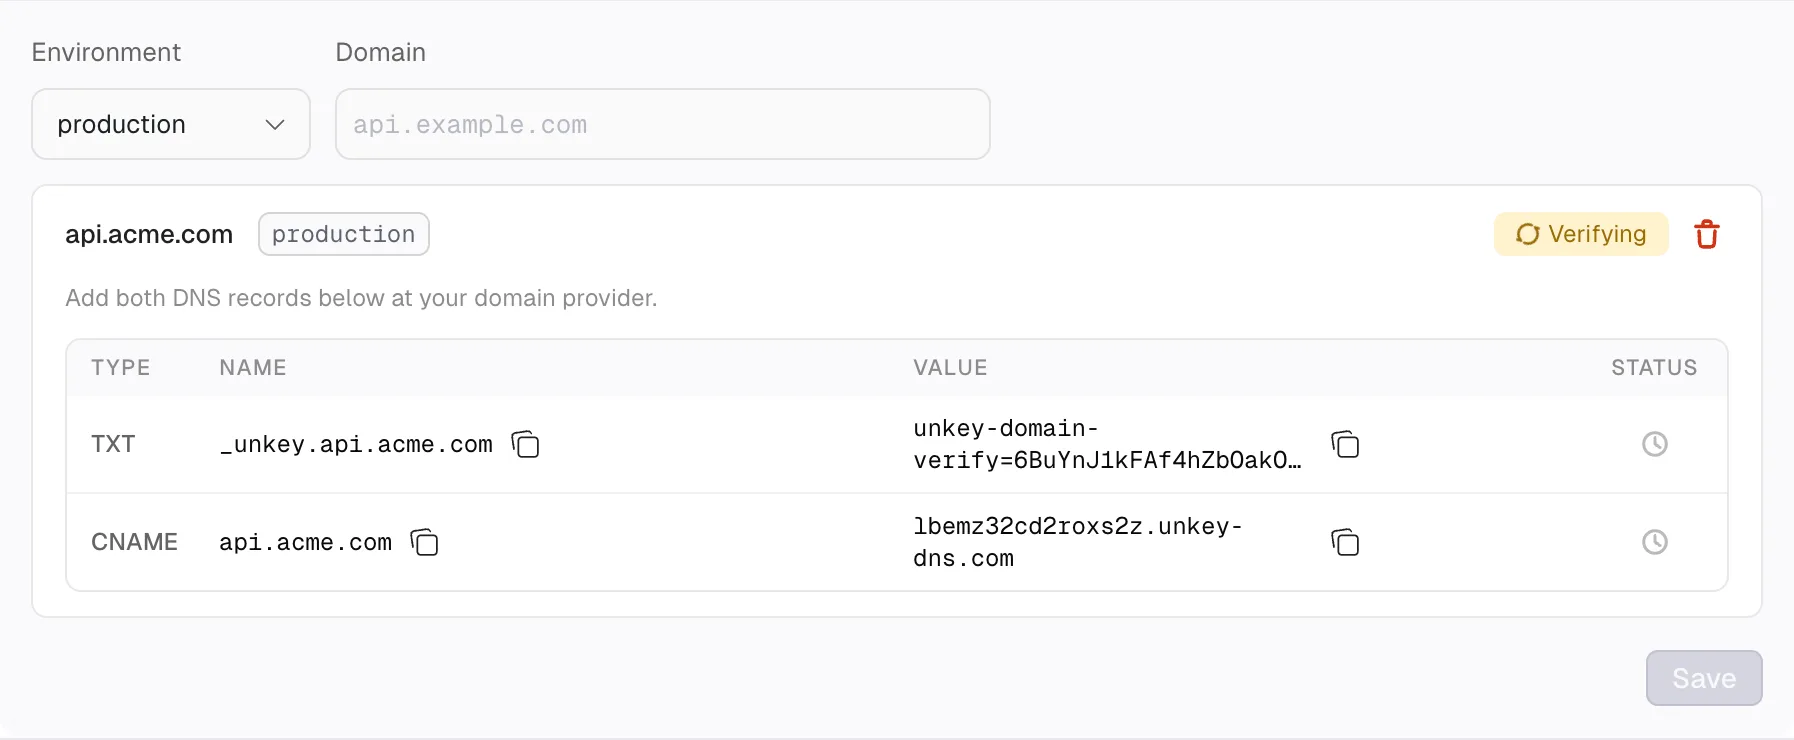
A TXT record proves ownership of the domain. A CNAME record routes traffic to your deployment. Each domain receives a unique CNAME target.
Add both records at your DNS provider. Unkey checks for them automatically and verifies within minutes once the records propagate.
Both DNS records must be verified within 24 hours. If verification doesn't complete in time, the domain enters a failed state. Click the Retry button to restart verification, or remove the domain and add it again.
Certificate provisioning#
After DNS verification succeeds, Unkey provisions a TLS certificate from Let's Encrypt using an ACME HTTP-01 challenge. Frontline serves the challenge token automatically during this process.
Certificates renew before expiration without any action from you.
If Let's Encrypt rate limits are reached, certificate issuance retries automatically with backoff. This can add up to two hours of delay in rare cases.
DNS provider examples#
If your provider supports automatic setup, you can skip these steps and use the one-click Connect button instead.
- Open your domain in the Cloudflare dashboard.
- Click DNS in the sidebar.
- Click Add record.
- Add the TXT record with name
_unkey.{your-subdomain}and the verification value. - Add the CNAME record with name
{your-subdomain}and the target from your Unkey dashboard. - Set the CNAME proxy status to DNS only (gray cloud) so Unkey can terminate TLS directly.
- Open your hosted zone in the Route53 console.
- Click Create record.
- Add the TXT record with name
_unkey.{your-subdomain}and the verification value wrapped in quotes. - Add the CNAME record with name
{your-subdomain}and the target from your Unkey dashboard.
- Open your domain in the Vercel dashboard under Settings > Domains.
- Click Manage next to your domain.
- Navigate to the DNS Records tab.
- Add the TXT record with name
_unkey.{your-subdomain}and the verification value. - Add the CNAME record with name
{your-subdomain}and the target from your Unkey dashboard.
Troubleshooting#
Domain stuck in verifying
Confirm your DNS records have propagated. TXT records can take up to 48 hours to propagate, depending on your DNS provider. You can check propagation with:
Certificate not issued after verification
Certificate provisioning starts automatically after both DNS records are verified. If the certificate isn't issued within 30 minutes, check that your CNAME proxy status is set to DNS only (not proxied) at your DNS provider.
Duplicate domain error
A domain can only be added once per workspace. If you see a duplicate domain error, check whether the domain already exists in your workspace, possibly in a different project or environment. Remove the existing entry before adding it again.